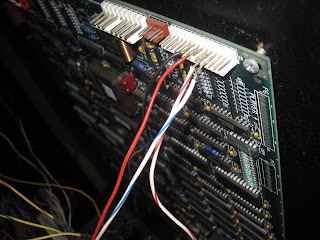
 |
| New wires connected. Also, my hobbit-like foot is seen. |

Street Fighter II Champion Edition Arcade Restoration Project: This blog was created to track my progress on this cabinet's renewal. I am not a professional, this is a learning experience. However, I hope others may be able to use this as a tool to help them with their own arcade adventures. FYI: These updates could be as far as two weeks behind the actual progress of the machine.
Saturday, July 21, 2012
Tuesday, July 17, 2012
Detaching old harness and securing kick harness
Sunday, July 15, 2012
Friday, July 13, 2012
Wednesday, July 11, 2012
Friday, July 15, 2011
Some updates...
It's been a moment, but I've still been working on this machine. I've decided to order a whole new Jamma harness for clean connections, some buttons, and some control panel clamps. Also, I've continued to scrape away at the sides and now am even closer to a clean side than this picture represents:
Friday, June 24, 2011
Attaching Kick Harness and Soldering the Rest...
Although I'm considering getting a new jamma harness, I'm alright with just soldering the left over wires into the controls.
 |
| The kick harness plugged into the board and CP (Control Panel). |
 |
| Simple iron from Radio Shack. |
 |
| Soldered in place. |
 |
| Need to solder the loose wires to the punch buttons. |
 |
| Now we're kicking it. |
Sunday, June 19, 2011
Wednesday, June 15, 2011
Time to scrape...
Thursday, June 9, 2011
Adjusting the screen/yoke...
 |
| Here are some thumb screws for screen adjustments. |
 |
| More adjustments thumbscrews (horizontal/vertical position etc.) |
 |
| It's not perfect but it's much better than it was. I might adjust it at a later time, but I' happy with how it looks now. |
Sunday, June 5, 2011
Kick Button Harness is in!
 |
| Here's the MK II board out of the case. |
 |
| I've found that the wires I desoldered from the main MKII board are also soldered to the control panel as well. |
Wednesday, June 1, 2011
Let's get the MKII board out of there.
Subscribe to:
Posts (Atom)


